
As an Amazon Associate we earn from qualifying purchases.
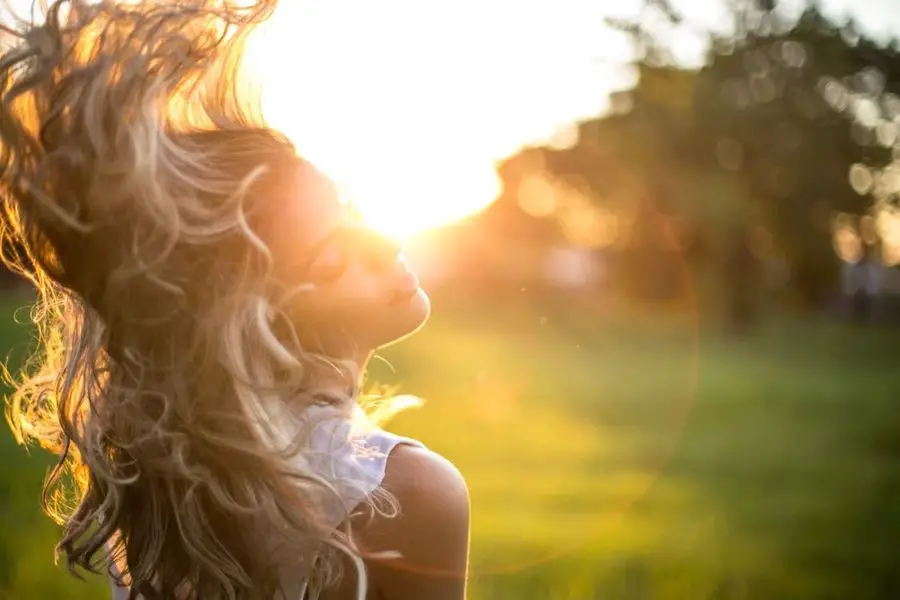
Regardless of your photography skills and the type of camera, it can be challenging to shoot portraits in broad daylight without having some sunlight glare on the face. Knowing how to remove sunlight from the face in Lightroom will help make your photos correctly exposed and aesthetically pleasing.
Contents
How to Remove Sunlight From a Face in Lightroom
Although many photographers use Lightroom for importing, managing, and organizing photos, especially when they have a large collection of images, Lightroom comes with photo editing features that can help you remove sunlight from the face in portraits.

Keeping in mind that RAW images contain the data and information from the camera sensor in unprocessed and uncompressed form, you will have better results when removing sunlight from a RAW image. However, Lightroom still allows you to import and edit processed and compressed image formats such as JPEGs.
Usually, Lightroom is a non-destructive photo editing application, so you can remove sunlight glare from the face without worries about the shadows as you can correct them later. Regardless of the image format, launch Lightroom, navigate to the Library panel and use the following steps to remove sunlight glare in Lightroom.
Increase the Exposure
In most cases, the camera’s light metering system will cause heavy shadows on some photo areas as it tries to balance the sunlight flare on the face. Typically, you don’t want to edit the photo before balancing these areas.
For instance, if you have a sunlight flare on the forehead with heavy shadows on the eyes, the photo will not be aesthetically pleasing even after removing the glare. Although increasing the image exposure might seem counterproductive when you want to remove flare from a photo, it helps to reveal the details.
Navigate to the Develop module in Lightroom, locate the exposure slider around the upper area of the Basic panel and move it to the right. Increasing the exposure brightens the shadows and worsens the glare, allowing you to work on the glare all at once without going back and brightening the shadows.
Pick the Adjustment Brush Tool
Like the brush tool in Photoshop, the Adjustment Brush is a powerful tool in Lightroom that will allow you to apply some photo edits to certain regions. For instance, after overexposing some photo areas when increasing the overall exposure, you can use the Adjustment Brush tool to reduce the exposure on those areas.
Whether you are using Lightroom Classic or Lightroom CC, you can use the following steps to pick and use the Adjustment Brush tool to get rid of sunlight from the face.

- Pick the Adjustment Brush tool by clicking on the Adjustment Brush icon located above the Basic panel and below the Histogram on the far right of the Lightroom Develop module.
- You can also pick it by hitting the keyboard shortcut key K,.
- Before starting to paint, you will need to resize the brush to be almost the same size as the area you want to edit. Usually, you can resize the brush using your mouse’s scroll wheel or hitting the bracket keys on your keyboard. The left bracket key [ reduces the size while the right bracket key ] increases the size
- Since you want to get rid of the sunlight from the face, you will need to paint the area with almost the same shade as the skin color. Click on the color tool to open the color picker dialogue, and then drag your mouse cursor to the target area where you want to pick the color in the image.
- Depending on the complexity of the photo, you may need to reduce the opacity of the brush to enhance the transitioning and blending of the color with the rest of the photo.
Paint the Sunlight
Start painting on the area you want to remove the glare by holding the left mouse button and dragging the mouse cursor over the area. Usually, a pinhead that looks like a white circle with a black dot at the center will appear at the spot where you start your painting if the brush is active.
After you are done painting, click on Done. The brush will become inactive, and the circle with the black dot at the center will change into a simple white circle. That means you can use this small circle to know when your brush is active or not. You can also click the pinhead to reactivate the brush and continue painting.
However, it can be challenging to know the areas you have already painted, especially if the opacity of the brush is low. The best way to avoid this issue is to add a visual effect by activating the Mask Overlay. Regardless of the operating system, you can activate it by hitting O.
Use a Radio Filter
Another way you can get rid of sunlight in a portrait is to use the Lightroom Radial Filter tool, located next to the Adjustment Brush. You can also open it by hitting the keyboard shortcut keys Shift + M. The Radial Filter allows you to create several off-center vignetted regions on certain image regions.
Navigate to the Effects drop-down and then choose Dehaze. Draw an elliptical region around the sunlight area of the face. Typically, this allows you to make local adjustments such as exposure, sharpness, and saturation changes.
Since you want to edit inside the marquee, select Invert Mask. Typically, having the Invert Mask selected will apply edits inside the marquee area, and having the Invert Mask not selected will apply edits outside the marquee area. Play around with Clarity and Dehaze settings until you get a natural look.
Important Tips on Removing Sunlight From Face in Lightroom
Keeping in mind that you are working on a portrait, you want the edits to blend seamlessly and the photos to look realistic and natural. Use the following refinement tips to improve the transitioning and blending:
- Remember to turn off the Mask Overlay by hitting the O key so you can see whether the blending and transitioning are seamless.
- It is advisable to zoom in to have a clear view of your edits. You can zoom in by hitting the keyboard shortcut key Ctrl and + if you’re using a Windows PC or Command and + if you’re using a Mac.
- You can use the Whites slider to balance the brightness of the edited area with the rest of the image.
- Depending on which part of the face you have worked on, you might need to use the Clarity slider to improve the overall texture of the edited area.
- Keeping in mind that you’re working on the face, which is the primary focal point when someone looks at a portrait, play around with the Shadows and Blacks to bring out the details and make the photo look natural and aesthetically appealing
Frequently Asked Questions
Can I Get Rid of Sunlight Glare in Lightroom by Cloning?
Yes, it is possible to get rid of sunlight glare from Lightroom by cloning. Unlike Adobe Photoshop, the cloning tool is known as the Spot Removal tool in Lightroom. However, it is advisable to use a healing brush as it blends the texture and color with the surrounding region.
Can I Add a Sun Glare in Lightroom?
You can add a sun glare in Lightroom using the Radial Filter Tool. Typically, this tool allows you to draw a circle and then apply local adjustments to the region by selecting Invert Mask. You can then play around with exposure settings to create a glare effect.
Final Thoughts
Whether your photos are in RAW or JPEG format, knowing how to remove sunlight from face in Lightroom will help you edit and balance the shadows, highlights, and exposure. Usually, you will need to use the Adjustment Brush or Radial Filter to make local adjustments to the area.