
Reviewed and updated: November 2, 2026
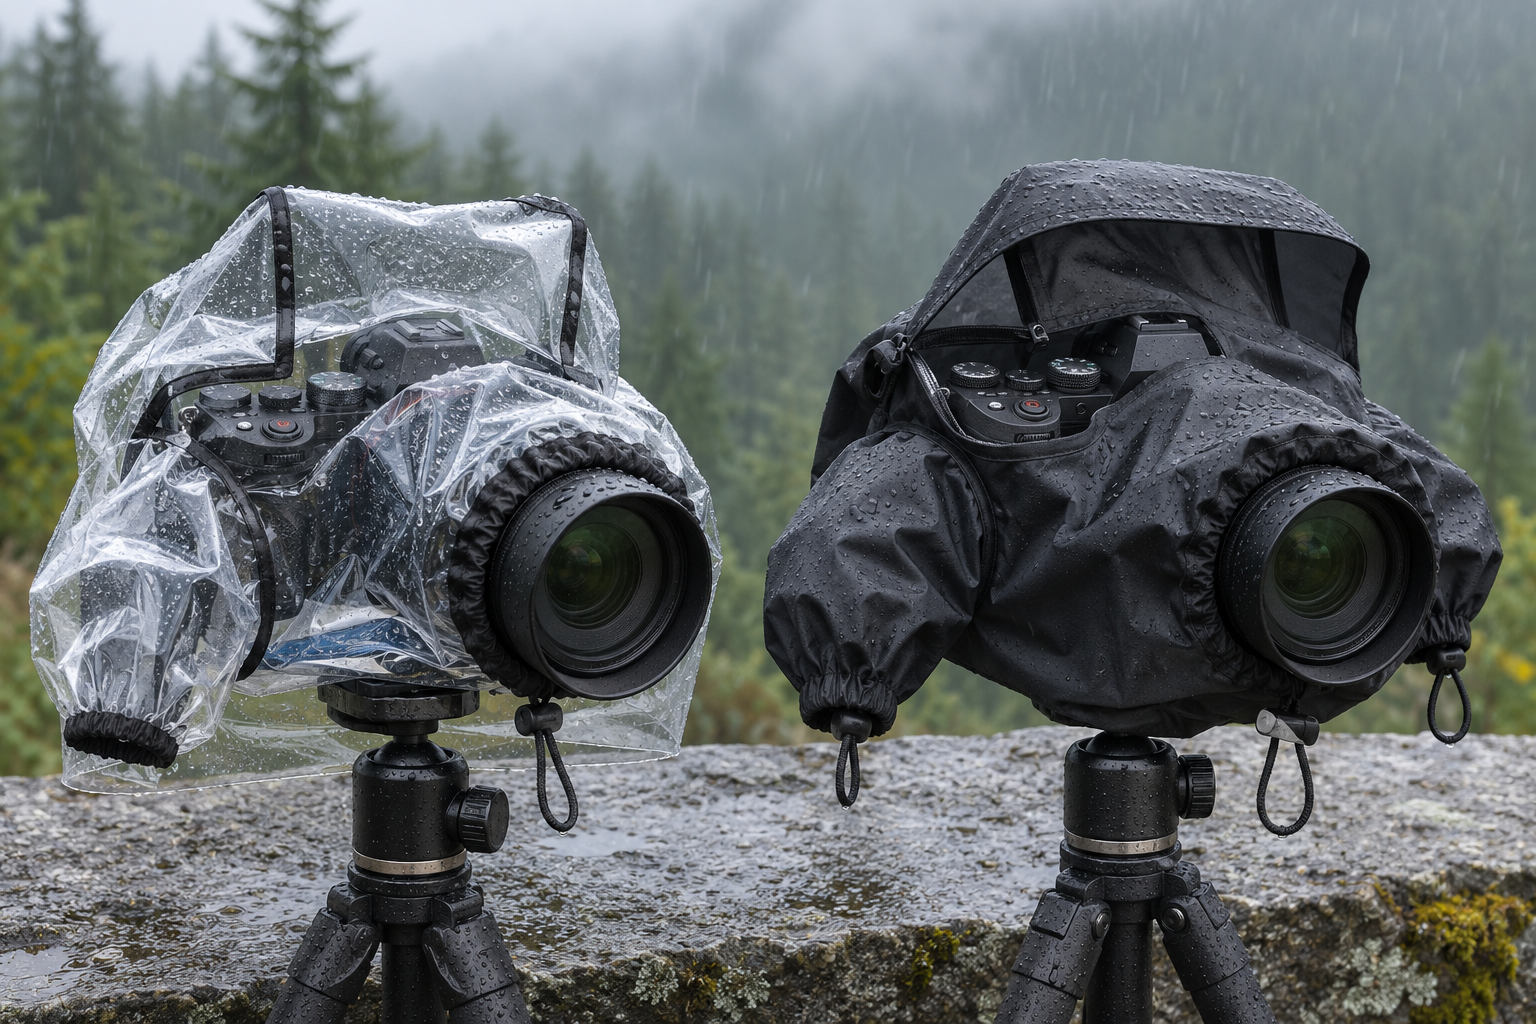
Rain covers are simple accessories with complicated fit questions. The cover must protect the camera and lens without blocking the viewfinder, controls, focus ring, tripod head, or strap connection. It also needs to match the size of the complete setup—not just the camera body. The Peak Design Shell Small and Think Tank Emergency Rain Cover Small represent two different approaches: a fitted stretch cover and a roomier sleeve-style cover.
Peak Design Shell Small Camera Cover
A fitted stretch cover for a compact camera setup. Match the listed size to the camera and lens combination rather than the body alone.
Check this model on Amazon: Peak Design Shell Small Camera Cover (paid link)
Think Tank Emergency Rain Cover Small
A sleeve-style rain cover with access points for operating the camera. Compare lens range, attachment method, viewfinder access and tripod use.
Check this model on Amazon: Think Tank Emergency Rain Cover Small (paid link)
Decide whether you need carrying protection or shooting access
A fitted shell stays close to the body and lens. It adds little bulk in a bag and can shield equipment from rain, snow, dust, and abrasion while carrying or briefly shooting. A sleeve cover creates a larger weather barrier with an opening for your hand and a window or open viewing configuration at the rear. It is designed for continuing to operate the camera in changing conditions.
Neither turns a camera into underwater equipment. Weather resistance varies by camera, lens, cover, attachment, and the direction and duration of exposure. In heavy rain, seek shelter, dry exterior water before changing lenses, and follow the equipment manufacturer’s environmental limits.
Our cold-weather camera care guide covers condensation, lens changes, and drying after a wet session.
Peak Design Shell Small: close-fitting protection
Peak Design describes the Shell as a four-way stretch, seam-taped cover intended to resist water, snow, dust, and abrasion. It can cinch closed for storage and packs into its built-in pocket. Ports accommodate the company’s camera straps, and the design is intended to work while the camera is carried, clipped, or mounted.
The Small size is for compact camera-and-lens combinations, but “small camera” is not a complete fit measurement. The lens length, hood diameter, grip, flash, microphone, cage, and strap anchors all affect whether the cover can close without strain. Compare the complete assembled kit with the manufacturer’s size guidance before ordering.
The fitted design has less loose fabric in wind, but access can require peeling the material back from controls. Practice indoors with the camera off. Confirm that the cover does not press buttons, turn dials, obstruct ventilation, or pull on a zoom barrel.
Think Tank Emergency Rain Cover Small: working sleeve
Think Tank’s Emergency Rain Cover Small is a seam-sealed sleeve with a cinchable hand opening, an oversized rear window, a hot-shoe mount, and a nonslip strap that attaches near the lens hood. The current official fit guidance lists standard or gripped camera bodies and several common professional zoom ranges. The published cover dimensions are approximately 12.2 inches long with an adjustable diameter.
The sleeve allows control access while keeping more of the camera enclosed. It can mount on a tripod or monopod and offers two rear-viewing configurations. The tradeoff is more material around the camera and more setup steps than a fitted shell.
The hot-shoe mount is a positioning aid, not a handle. Make sure it is fully seated without forcing it, and do not lift the camera by the cover. Check how the cover and strap interact with any flash trigger, microphone, cage, or other shoe-mounted accessory.
Measure the actual field setup
Mount the lens and hood you expect to use, extend the zoom to its longest physical position, and attach the grip or tripod plate. Measure from the back of the camera to the front of the hood. Measure the widest point around the body and lens area. Compare those numbers with official guidance and leave room to operate controls.
If you switch between a compact prime and a long zoom, one Small cover may not serve both comfortably. A cover that is too tight can pull against the zoom mechanism or leave gaps. A cover that is too large can flap, collect water, or fall in front of the lens.
For tripod use, check whether the cover clears the head, plate release, and panning controls. For handheld use, verify that your supporting hand can reach the zoom and focus rings without exposing a large opening toward the rain.
Prepare before the weather changes
Practice installing the cover at home. Time yourself without rushing and learn which edge faces forward. Store the cover in an accessible outer pocket rather than beneath the rest of the kit. A small absorbent cloth in a separate bag can remove exterior droplets, but it should never be packed wet against the camera.
Fit the lens hood before the cover if the instructions call for a hood attachment. Keep the front opening behind the hood’s leading edge so fabric cannot enter the frame. Recheck after zooming because some lenses change length significantly.
Our rain-cover fit guide includes stability checks that still matter when wind catches a rain cover.
Use the cover without trapping problems
Avoid changing lenses in blowing rain or dust. If a change is unavoidable, move to a dry sheltered area and dry the outside of the cover first. Keep memory-card and battery doors closed. Watch for water running along the strap toward an opening.
In warm humid conditions, moisture can collect inside any cover. Do not seal a wet camera in a bag after shooting. Move to a protected location, power down, wipe exterior moisture, and allow the cover and equipment to dry separately as their instructions permit.
Cold-weather transitions require care too. Moving a cold camera directly into warm humid air can cause condensation. Keep it enclosed in the camera bag during the temperature change and allow it to warm gradually before opening the bag.
Clean and store correctly
Peak Design and Think Tank publish product-specific care directions, so follow the current instructions for the exact cover. In general, shake off loose debris, rinse only when permitted, and let the cover dry completely before folding it into its pouch. Do not use heat, bleach, waterproofing spray, or machine washing unless approved.
Inspect seam tape, drawcords, windows, hook-and-loop areas, and attachment straps. A clear rear panel that becomes deeply scratched or cloudy can make camera information hard to read. Replace a cover with damaged seams or a closure that will not stay secure.
Which one should you choose?
The Peak Design Shell Small is the more compact option for a compatible smaller kit when you value close-fitting carrying protection and low bulk. The Think Tank Emergency Rain Cover Small is the more operational option when you need a sleeve, rear viewing, hand access, tripod use, and a defined hood attachment.
Fit is the deciding factor. Check the exact camera, lens, hood, grip, and support setup against current official guidance, then practice before leaving home. The best rain cover is the one you can install correctly, operate without compromising control, and dry fully after the weather clears.